Prestashop WordPress Recent Blog Posts User Guide
1. About Module.
- This Module works on only ecommerce store created using Prestashop.
- This Module compatible with Prestashop above 1.7x.
- This Module is not free.
2.Installation Guide.
- Login into your (Prestashop) store in administration panel.
- Go to Modules -> Upload a module.
- Select prewprecentposts.zip you have downloaded in our store.
3.General Settings Form.
- After you have successfully installed module then after go to the module configure page.
- All the fields explain in General Settings Form Fields in Details section.
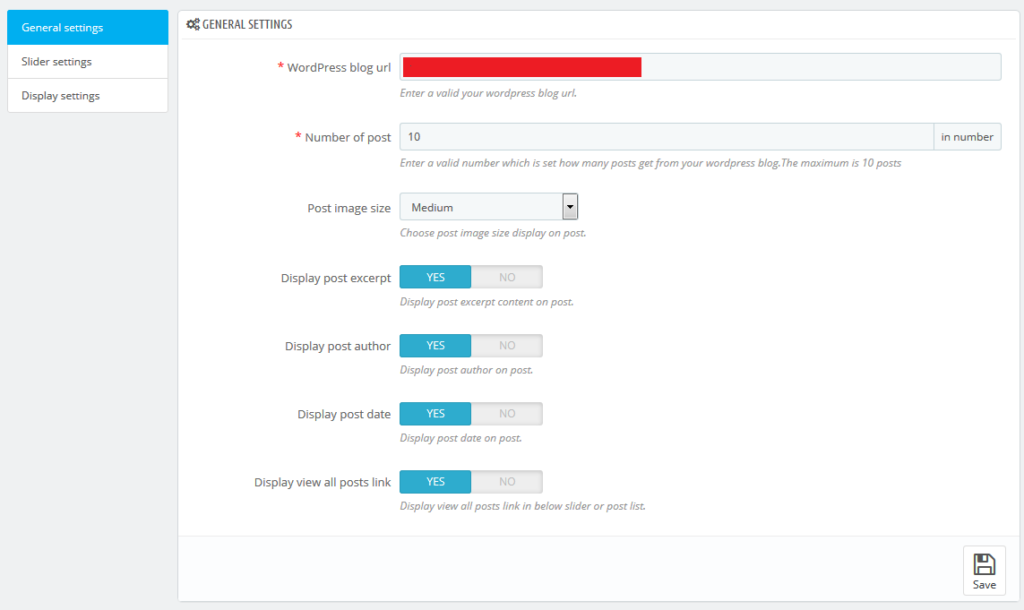
4. General Settings Form Fields in details.
- WordPress blog url
- Default value: NULL
- Input value: Valid url
- Required: Yes.
- Descriptions: Enter a valid your WordPress site blog url. This identifies which site gets the WordPress recent posts.
- Number of post
- Default value: 10
- Input value: In Number
- Required: Yes.
- Descriptions: Enter a valid number which is set how many posts get from your WordPress blog. The maximum is 10 posts.
- Post image size
- Default value: Medium
- Input value: Select Box
- Required: Yes.
- Descriptions: Choose post image size “Medium”, “ Thumbnail” Or ”Large”. This option is WordPress media image size options.
- Display post excerpt
- Default value: Yes
- Input value: Switch button
- Descriptions: If you choose YES then enable display post excerpt content on post listing.
- Display post author
- Default value: Yes
- Input value: Switch button
- Descriptions: If you choose YES then enable display post excerpt content on post listing.
- Display post date
- Default value: Yes
- Input value: Switch button
- Descriptions: : If you choose YES then enable display post date on post listing.
- Display view all posts link
- Default value: Yes
- Input value: Switch button
- Descriptions: : If you choose YES then enable display view all post link right after the post listing..
5. Slider Settings Form.
- After you have successfully configured General Settings form then after configure Slider Settings Form.
- All the fields explain in Slider Settings Form Fields in Details Section.
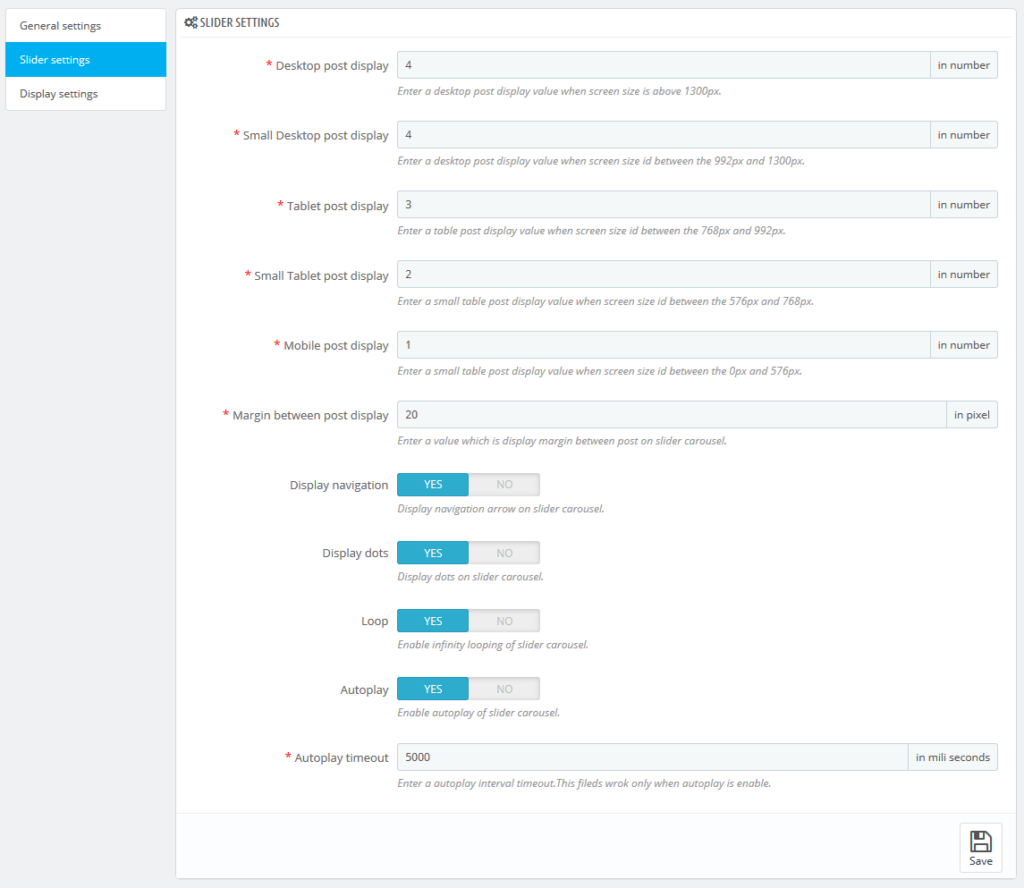
6. Slider Settings Form Fields in details.
- Desktop post display
- Default value: 5
- Input value: In number
- Required: Yes.
- Descriptions:: Enter a value which is identifies the how many post items display on desktop when screen size is above 1300px.
- Small Desktop post display
- Default value: 4
- Input value: In number
- Required: Yes.
- Descriptions:: Enter a value which is identifies the how many post items display on small desktop when screen size is between the 992px and 1300px.
- Tablet post display
- Default value: 3
- Input value: In number
- Required: Yes.
- Descriptions:: Enter a value which is identifies the how many post items display on tablet when screen size is between the 768px and 992px.
- Small Tablet post display
- Default value: 2
- Input value: In number
- Required: Yes.
- Descriptions:: Enter a value which is identifies the how many post items display on small tablet when screen size is between the 576px and 768px.
- Mobile post display
- Default value: 1
- Input value: In number
- Required: Yes.
- Descriptions:: Enter a value which is identifies the how many post items display on mobile when screen size is between the 0px and 576px.
- Margin between post display
- Default value: 10
- Input value: In number
- Required: Yes.
- Descriptions:: Enter a value which is set margin between two post items on slider carousel.
- Display navigation
- Default value: Yes
- Input value: Switch button
- Descriptions:: If you choose YES then enable display navigation arrow on posts slider carousel.
- Display dots
- Default value: Yes
- Input value: Switch button
- Descriptions:: If you choose YES then enable display navigation dots on posts slider carousel.
- Loop
- Default value: Yes
- Input value: Switch button
- Descriptions:: If you choose YES then enable infinity looping of posts slider carousel.
- Autoplay
- Default value: Yes
- Input value: Switch button
- Descriptions:: If you choose YES then enable autoplay of posts slider carousel.
- Autoplay timeout
- Default value: 5000
- Input value: in milliseconds number
- Descriptions:: Enter a value of autoplay interval timeout which is identifies the how much time interval between auto slide. This field’s work only when autoplay is enabling.
7.Display Settings Form.
- After you have successfully configured Slider Settings form then after configure Display Settings Form.
- All the fields explain in Display Settings Form Fields in Details Section.

8.Display Settings Form Fields in details.
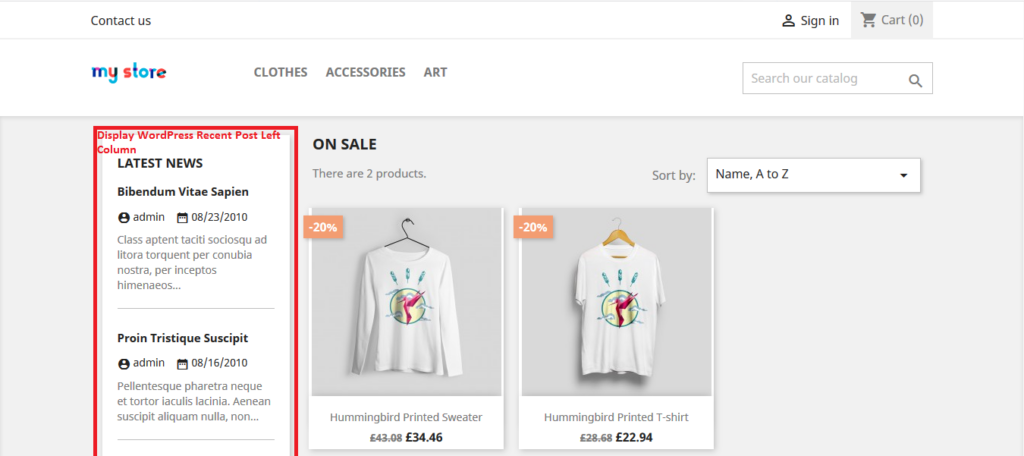
- Display left column
- Default value: No.
- Input value:Switch button
- Descriptions:: If you choose YES then enable display list of post on left column of page.
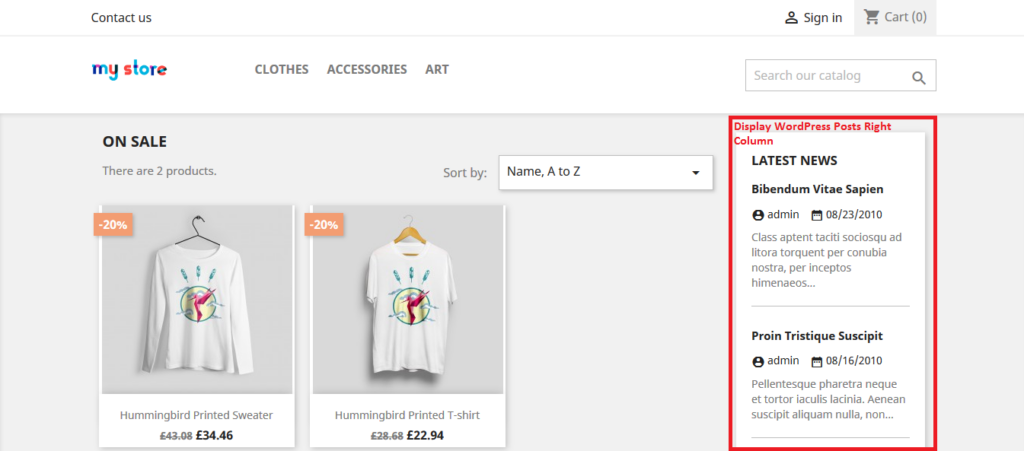
- Display right column
- Default value: No.
- Input value:Switch button
- Descriptions:: If you choose YES then enable display list of post on right column of page.
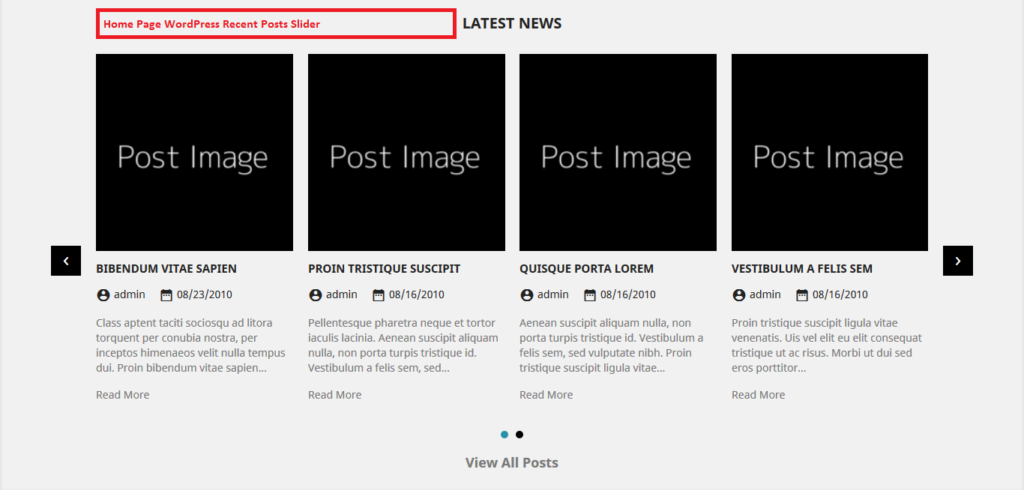
9. Work Process in Frontend.
- If you have configured all backend form then after you see the result of frontend.
- See here Home page WordPress Recent Posts Slider Layout
- See here list of WordPress Recent Posts in page left column.
- See here list of WordPress Recent Posts in page right column.