Prestashop Signup Discount Welcome Voucher User Guide
1. About Signup Discount Module.
- Signup Discount Module works on only ecommerce store created using Prestashop.
- Signup Discount Module compatible with Prestashop above 1.7x.
- Signup Discount Module is not free.
2. Installation Guide.
- Login into your (Prestashop) store in administration panel.
- Go to Modules->Add New Modules Or Install a Module.
- Select productwhatsappshare.zip you have downloaded and clicks upload this module.
- Scroll down find Product WhatsApp Share Module and Configure module.
3. General Settings Form.
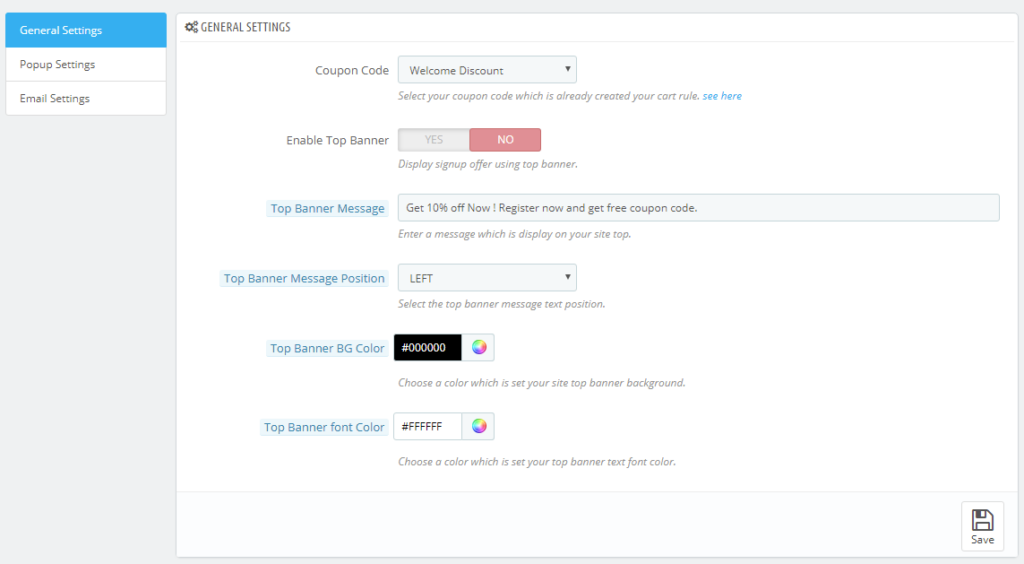
- After you have successfully installed Product WhatsApp Share module then after configure General Settings Form.
- All the fields explain in General Settings Form Fields in Details Sections.

4. General Setting Fields in details.
- Coupon Code
- Default value: Welcome Discount.
- Input value: Select Box.
- Required: Yes.
- Descriptions: Select coupon code value. This coupon code value is send customer email when register or signup onstore.This value comes fromdefault Prestashop cart rule tab. When module install then Welcome Discount rule is automatically created.
- Enable Top banner
- Default value: NO.
- Input value: Switch Button.
- Required: No.
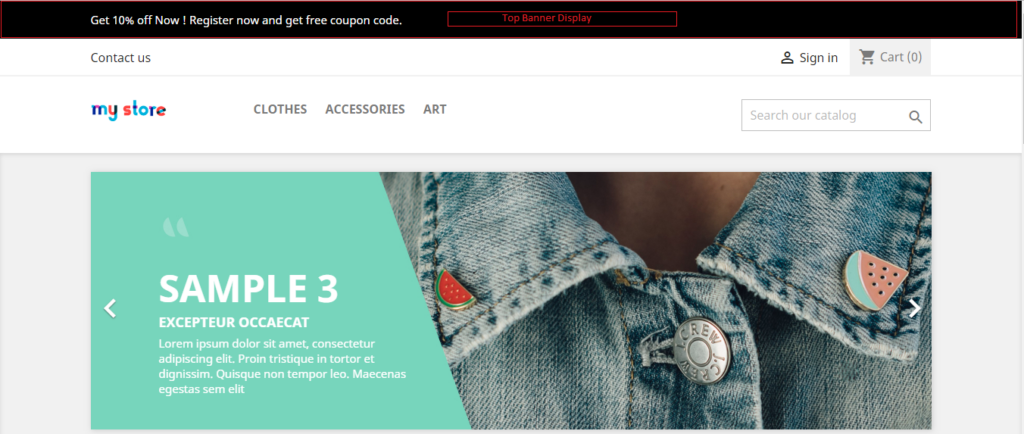
- Descriptions: Display signup offer choosing YES or NO. If you choose YES then top banner display on your store front side.
- Top Banner Message
- Default value: Get 10% off now! Register now and get free coupon code.
- Input value: Text.
- Required: Yes if Enable Top Banner.
- Descriptions: Enter a top banner message which is display on your store front side
- Top Banner Message Position
- Default value: LEFT.
- Input value: Select Box.
- Required: No.
- Descriptions: : Select LEFT, RIGHT or CENTER position of tour top banner message text
- Top Banner BG Color
- Default value: #000000.
- Input value: Color Type.
- Required: No.
- Descriptions: : Select or enter your top banner section background color.
- Top Banner Font Color
- Default value: #FFFFFF.
- Input value: Color Type.
- Required: No.
- Descriptions: : Select or enter your top banner message text color.
5. Popup Settings Form.
- After you have successfully configured General Settings form then after configure Popup Settings Form.
- All the fields explain in Popup Settings Form Fields in Details Section.
- Popup Image
- Default value:module default image.
- Input value: Select image.
- Required: Yes if Enable Popup.
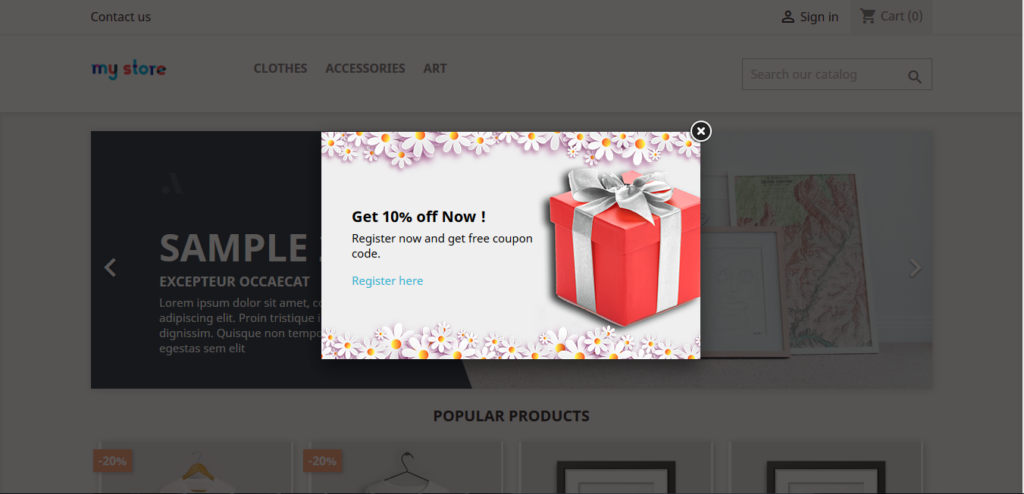
- Descriptions: Upload an image for your popup banner. The recommended dimensions are 500px * 300px.
- Popup Description
- Default value:module default text.
- Input value: Text with html.
- Required: Yes if Enable Popup.
- Descriptions: Enter a popup description. You can enter also html tag.
- Popup Description Width
- Default value:250.
- Input value: Number.
- Required: Yes if Enable Popup.
- Descriptions: Enter a value of popup description width. This is your popup description section width.
- Popup Description Top position
- Default value: 100.
- Input value: Number.
- Required: Yes if Enable Popup.
- Descriptions: Enter a value of popup description top position. This is your description section top space assign.
- Popup Description Left position
- Default value: 400.
- Input value: Number.
- Required: Yes if Enable Popup.
- Descriptions: Enter a value of popup description left position. This is your description section left space assign.
6. Email Settings Form.
- After you have successfully configured Popup Settings form then after configure Email Settings Form.
- All the fields explain in Email Settings Form Fields in Details Section.

7. Email Settings Form Fields in details.
- Email Subject
- Default value: Signup Discount.
- Input value: Text.
- Required:Yes.
- Descriptions: Enter email subject.
- Email Body
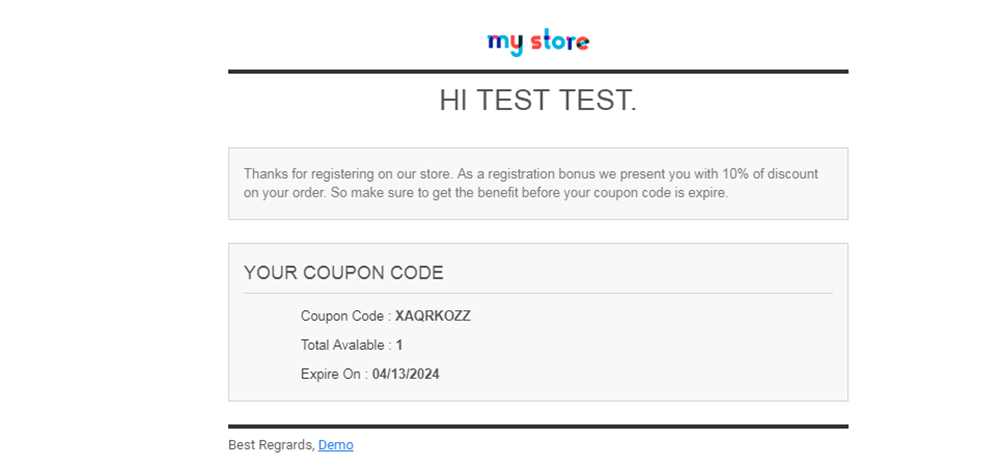
- Default value: Thanks for registering on our store. As a registration bonus we present you with 10% of discount on your order. So make sure to get the benefit before your coupon code is expire..
- Input value: Text.
- Required:No.
- Descriptions: Enter email body message..
8. Work Process in Frontend.
- Backend data added successfully then after you can see the front end. See image here.


