Prestashop eKashu (NMI) Hosted Payment Module User Guide
1. About Module.
- This Module works on only ecommerce store created using Prestashop.
- This Module compatible with Prestashop above 1.7x.
- This Module is not free.
2.Installation Guide.
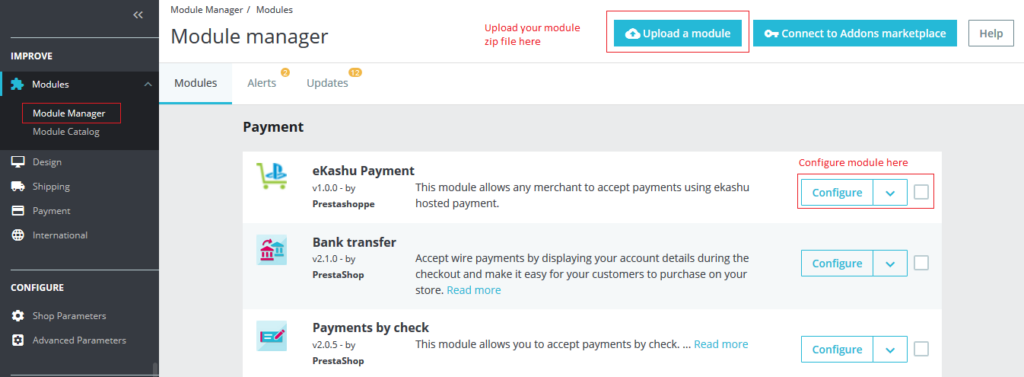
- Login into your (Prestashop) store in administration panel.
- Go to Modules -> Upload a module.
- Select preekashu.zip you have downloaded in our store.
3. About Module.
- After you have successfully installed module then go to the module configure page.
- All the fields explain in General Settings Form Fields in Details section.
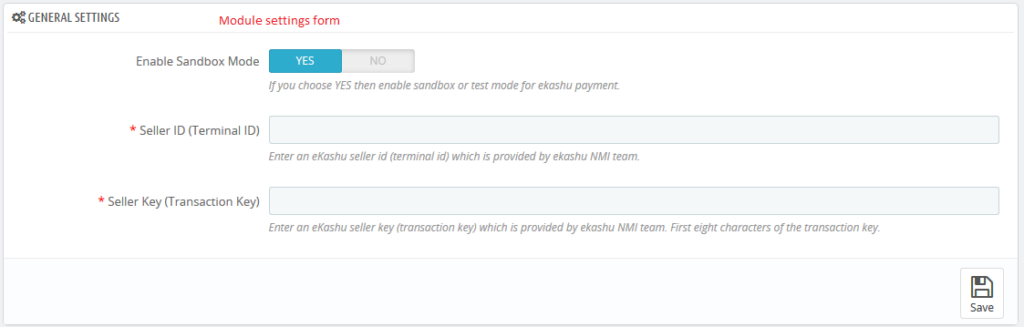
4. General Settings Form Fields in Details.
- Enable Sandbox Mode
- Default value: Yes
- Input value: Switch Button.
- Descriptions: If you choose YES then enable sandbox or test mode for eKashu (NMI) payment.
- Seller ID (Terminal ID)
- Default value: Null
- Input value: Text
- Required: Yes.
- Descriptions:Enter an eKashu seller id (terminal id) which is provided by eKashu NMI team.
- Seller Key (Transaction Key)
- Default value: Null
- Input value: Text
- Required: Yes.
- Descriptions: Enter an eKashu seller key (transaction key) which is provided by eKashu NMI team. First eight characters of the transaction key.
5. Work Process in Frontend.
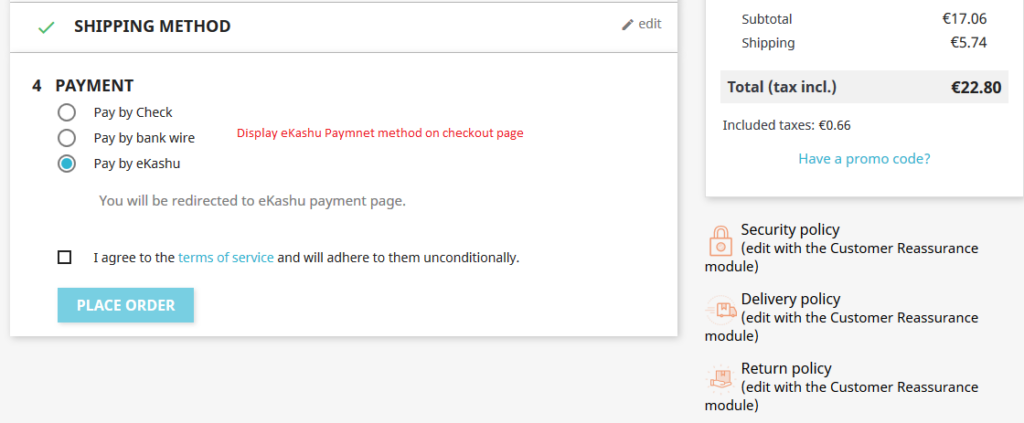
- If you have successfully configured backend form then after you seeeKashu payment on checkout page.
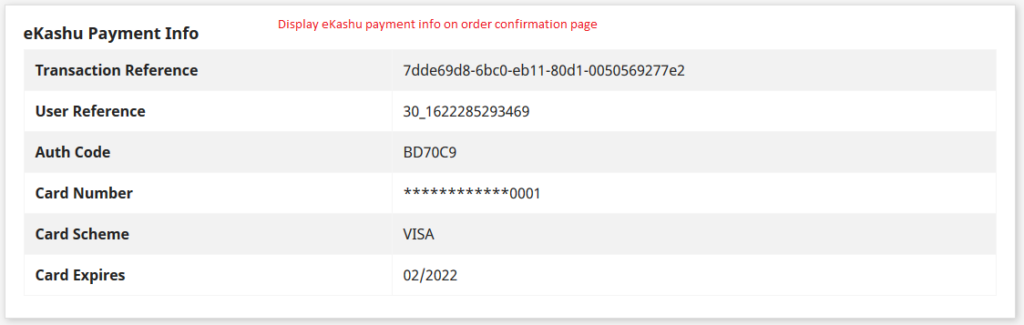
- Customer successful place the order on store then after customer seesthe eKashu payment information on order conformation page.
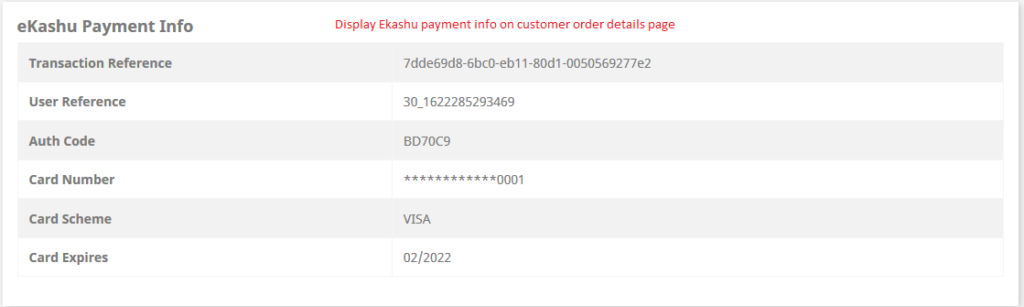
- Customer also see the all eKashu payment information his account order details page
6. Work Process in Backend.
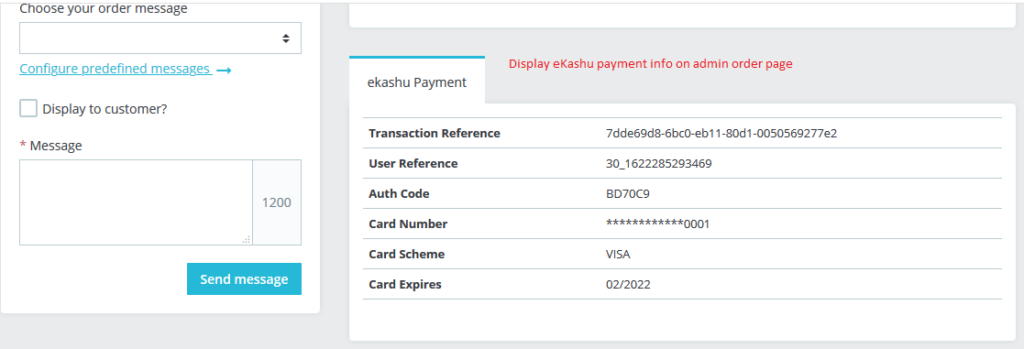
- Store owner see all eKashu payment information admin order details page.