Prestashop Interswitch Webpay Payment User Guide
1. About Module.
- This Module works on only ecommerce store created using Prestashop.
- This Module compatible with Prestashop above 1.7x.
- This Module is not free.
2.Installation Guide.
- Login into your (Prestashop) store in administration panel.
- Go to Modules -> Upload a module.
- Select prewebpayinterswitch.zipyou have downloaded in our store.
2.General Settings Form.
- After you have successfully installed module then after go to the module configure page.
- All the fields explain in General Settings Form Fields in Details section.
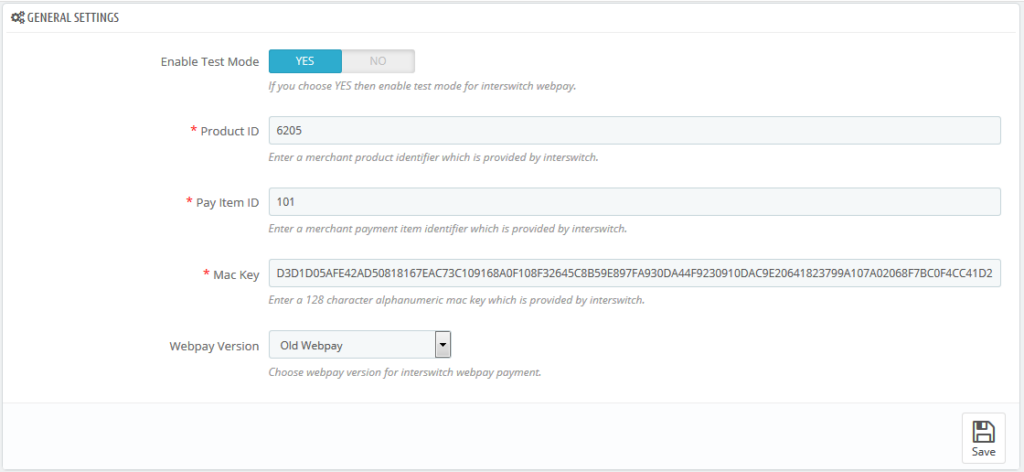
4. General Setting Fields in details.
- Enable Test Mode
- Default value: No
- Input value: Switch button
- Descriptions: If you choose YES then enable test mode for interswitch webpay.
- Product ID
- Default value: Null
- Input value: Text
- Required: Yes.
- Descriptions: Enter merchant product identifier which is provided by interswitch.
- Pay Item ID
- Default value: Null
- Input value: Text
- Required: Yes.
- Descriptions:Enter merchant payment item identifier which is provided by interswitch.
- Mac Key
- Default value: Null
- Input value: Text
- Required: Yes.
- Descriptions: Enter 128 character alphanumeric mac key which is provided by interswitch.
- Mac Key
- Default value: New Webpay
- Input value: Select box
- Descriptions: Choose webpay version for interswitch webpay payment.
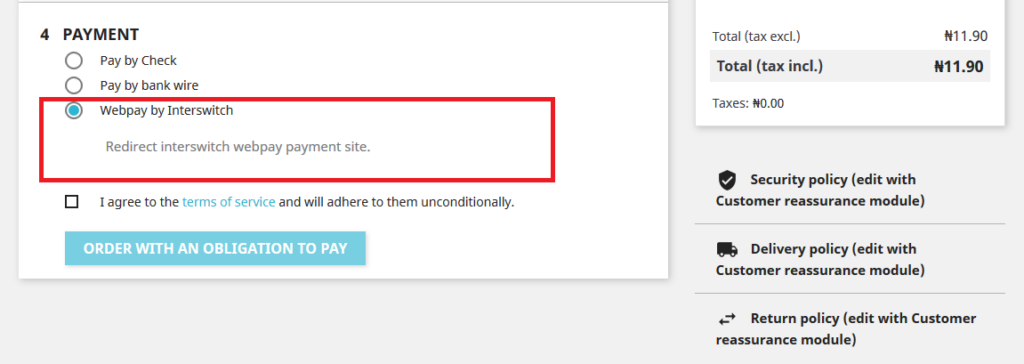
5. Work Process in Frontend.
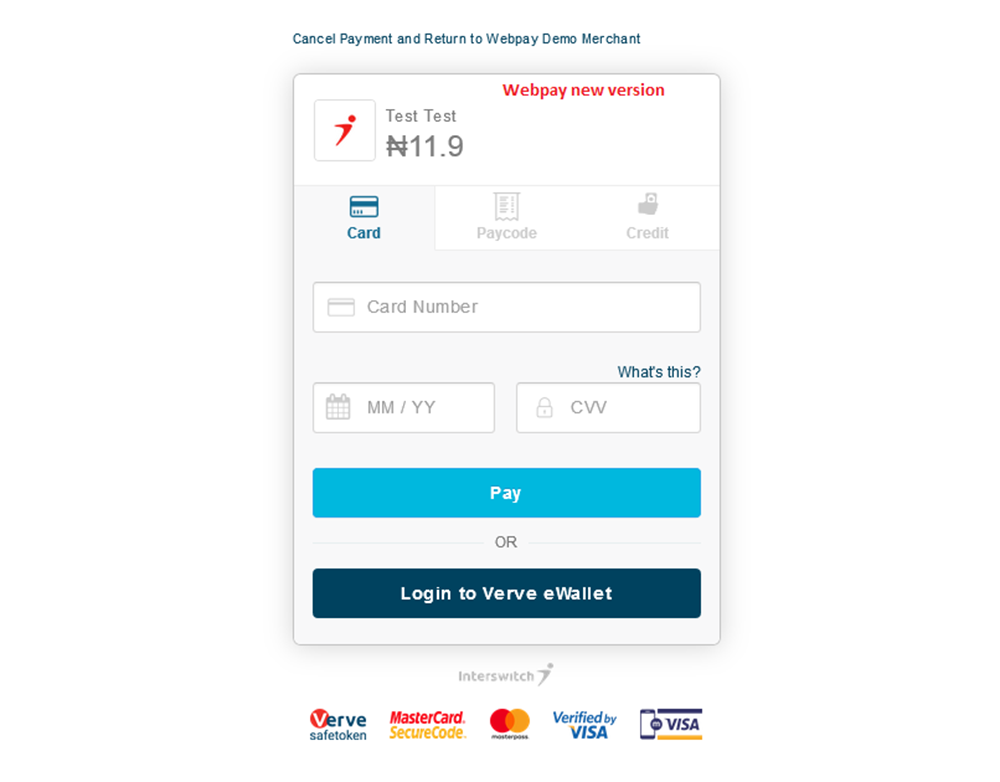
- If you have successfully configured backend form then after you sees the Webpay by Interswitch payment on checkout page.
- Default value: No
- Input value: Switch button
- Descriptions: If you choose YES then enable test mode for interswitch webpay.
- Default value: Null
- Input value: Text
- Required: Yes.
- Descriptions: Enter merchant product identifier which is provided by interswitch.
- Default value: Null
- Input value: Text
- Required: Yes.
- Descriptions:Enter merchant payment item identifier which is provided by interswitch.
- Default value: Null
- Input value: Text
- Required: Yes.
- Descriptions: Enter 128 character alphanumeric mac key which is provided by interswitch.
- Default value: New Webpay
- Input value: Select box
- Descriptions: Choose webpay version for interswitch webpay payment.